Building a Smarter Chess Clock
A foray into building in public
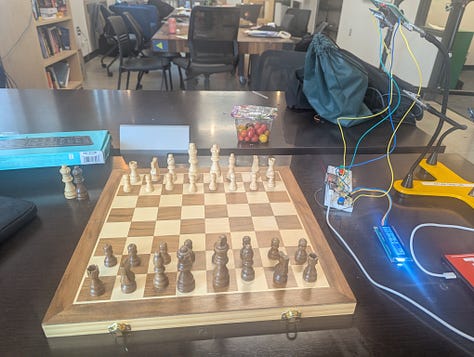
For my Creative Technologies class – which delves into physical computing (like Arduinos and Raspberry Pis) and digital fabrication (laser cutting, 3D printing) – I decided to build a chess clock with an integrated camera.
This project also became a testing ground for applying Large Language Models (LLMs) like ChatGPT and Gemini more effectively in my workflow, a topic I touched on in my previous post, "Building with Words." I enjoy synthesizing ideas, so this chess clock project explored how AI could assist not just with software development, but with hardware design and component selection too.
In this post, I'll walk you through:
The Motivation & Vision: Why build this, and what's the ultimate goal?
What I Built & How: The current state, the process, and the role AI played.
What's Next: Future plans and improvements.
More Building in Public: Reflections on this approach.
Motivation & Vision: Bridging Physical and Digital Chess
I love playing chess. The competition sharpens my focus, the relational aspect of sharing a game with a friend is rewarding, and the strategic thinking involved pushes me to grow. Playing online offers convenience and powerful analysis tools, but nothing beats the embodied experience of playing over a physical board.
However, I often wish I could easily review my in-person games afterward, much like online platforms allow. This desire sparked the core idea: a standard chess clock, but with a camera that captures the board state after each move.
Imagine hitting your clock button, and snap – a photo is taken. After the game, you have a visual log of every position. With computer vision, these images can be translated into standard chess notation (like FEN), allowing for computer analysis or simply letting you and your friend easily revisit key moments. That's the vision: merging the tangible joy of physical chess with the analytical power of digital tools.
What I Built and How: Embracing the Hardware Challenge (with AI Help)
Hardware is where I'm still learning the ropes. My background is primarily in software, so wiring circuits, programming microcontrollers, and 3D printing enclosures are newer frontiers for me. This project was a great learning opportunity, increasingly supported by AI as a creative partner.
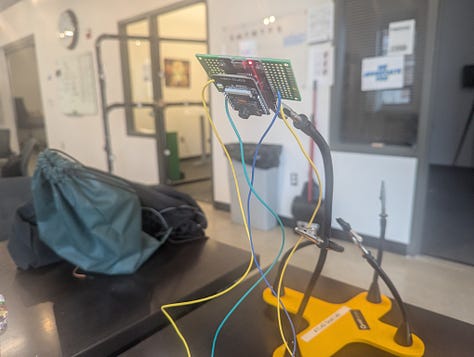
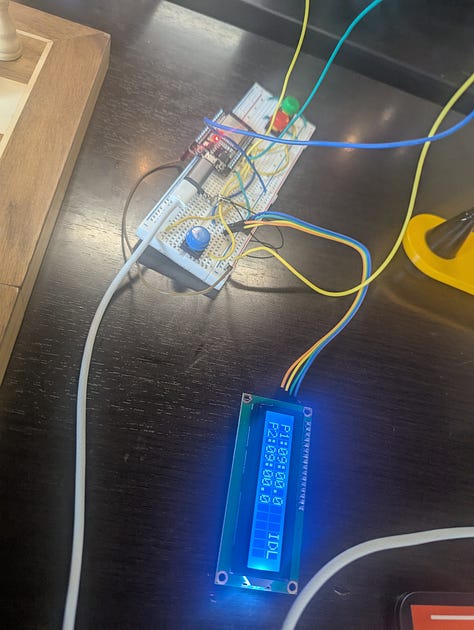
1. Hardware Hurdles & Iteration: My initial plan, guided by AI conversations, involved an ESP32-CAM for its built-in camera and connectivity, buttons for the players and reset, and an I2C LCD screen. Simple enough, right? Well, I soon discovered the ESP32-CAM's GPIO pins are largely dedicated to the camera, making it tricky to connect other components.
The workaround involved using two ESP32s: a standard ESP32 DevKit managing the buttons, LCD, and Bluetooth, communicating via serial with the ESP32-CAM, which solely handled image capture. The AI did hint at potential pin limitations, but sometimes you have to learn things the hard way! You can see the final pin connections in the Project Specifications (Section 3.2).


2. Refining the Software Workflow: Initially, I used the standard Arduino IDE. However, discovering the PlatformIO extension for VSCode was a game-changer. Since I already use Cursor (a VSCode fork with integrated AI), I could now prompt my AI assistant to directly edit the Arduino code. This eliminated the tedious copy-pasting between a chatbot and the IDE, streamlining debugging significantly.
3. Designing the Enclosure (The Next Frontier): I haven't yet 3D printed a case. Enclosure design is still an area I'm developing, and I wanted the internal electronics finalized first. This delay was probably for the best, given the hardware changes I'm planning.
My process for the enclosure involves using AI to generate initial design concepts based on the project requirements (see 3D Model Specs). I then use AI image generation to create visual mockups. The next step, which I haven't tackled yet, is using tools like Blender MCP (Model Context Protocol) to allow my AI coding assistant to interact directly with Blender for 3D modeling. It was a bit rudimentary last time I tried, but the technology is improving rapidly.
4. Building the Mobile App & Defining Protocols: Connecting the clock hardware to a mobile app via Bluetooth was one of the most satisfying parts. After drafting the Arduino code, I prompted Cursor to generate a Bluetooth communication specification (BLE_SPECS.md). This markdown file clearly defined how the Arduino and the Flutter app would talk to each other (UUIDs, data formats for game state and image transfer).
I then took a previous Flutter app (itself an AI-generated simplification of an earlier project) and asked the AI to adapt it using the new BLE specification. Defining these communication protocols loosely in markdown proved effective – easily understandable by both humans and AI. I continued refining the Flutter app to create a clean clock interface and display the stream of captured board images.
5. Integrating Computer Vision (Work in Progress): The final piece was adding the computer vision component to translate board images into FEN notation. More AI collaboration, including using tools like Perplexity via MCP for research, helped spin up a basic Python Flask server using OpenCV and a Keras/TensorFlow model. I got the Flutter app sending images to the server and receiving FEN strings back.
However, this part needs more refinement for reliable recognition. The current low-quality images from the ESP32-CAM are a bottleneck. I've considered using a cloud-based vision API as a simpler alternative, but improving the camera setup is the priority.
What's Coming Next?
The initial build highlighted some limitations, leading to the next steps:
Hardware Upgrade: The dual ESP32 setup works, but it's clunky. The camera quality and processing power are limiting factors for reliable vision and fast BLE transfer. I'm planning to switch to a Raspberry Pi Zero W paired with an ArduCam. This offers significantly more processing power and better camera options while still providing GPIO pins for buttons and an LCD.
3D Printed Enclosure: Once the new hardware is integrated, I'll focus on creating a proper 3D printed case based on the mockups and 3D Model Specs. This will involve either refining my AI-assisted Blender workflow or diving into some manual 3D modeling.
Software Polish: I'll refine the Flutter app and the vision server, perhaps adding features to track player identities for better game analysis. Making the project easy for others to replicate (better open-sourcing) is also a goal, hoping to build a small community around it. You can follow the overall technical direction in the main Project Specifications.
More Building in Public
This post is an experiment. I intend to document my projects and processes more openly moving forward. Partly, it's about sharing learnings and inviting collaboration. But it's also about accountability. Too often, projects reach the "mostly done" stage and stall. By writing about them, documenting the process, and outlining next steps, I hope to create the structure needed to push through to completion.
Thanks for following along on this journey! Let's see where it goes.

